I knew from the get go in the nursery I wanted some kind of accent wall. At first I toyed with the idea of doing this wallpaper, but then decided after seeing this herringbone accent wall, I wanted to do some version of that.
We are working with a pretty small room so I didn't want to go too dark or too busy. So, I mocked up a plan in Photoshop, tweaked it until I was satisfied, and got started on our gold herringbone wall. I wanted more of a three dimensional effect rather than painting a pattern on the wall, so we used pvc screen moulding from our local hardware store to create the pattern. It's definitely more complicated than painting it on but I really wanted something that would pop out.
Side Note: Screen moulding has a rounded edge and will not be flush where the cuts meet. However, if you flip them over and use the back side, the cuts will be flush, but the rounded edge will not be flush against the wall. We opted for flush against the wall with non flush cuts.
First we took our blank wall and our laser level...
![]()
and began placing our vertical rows.
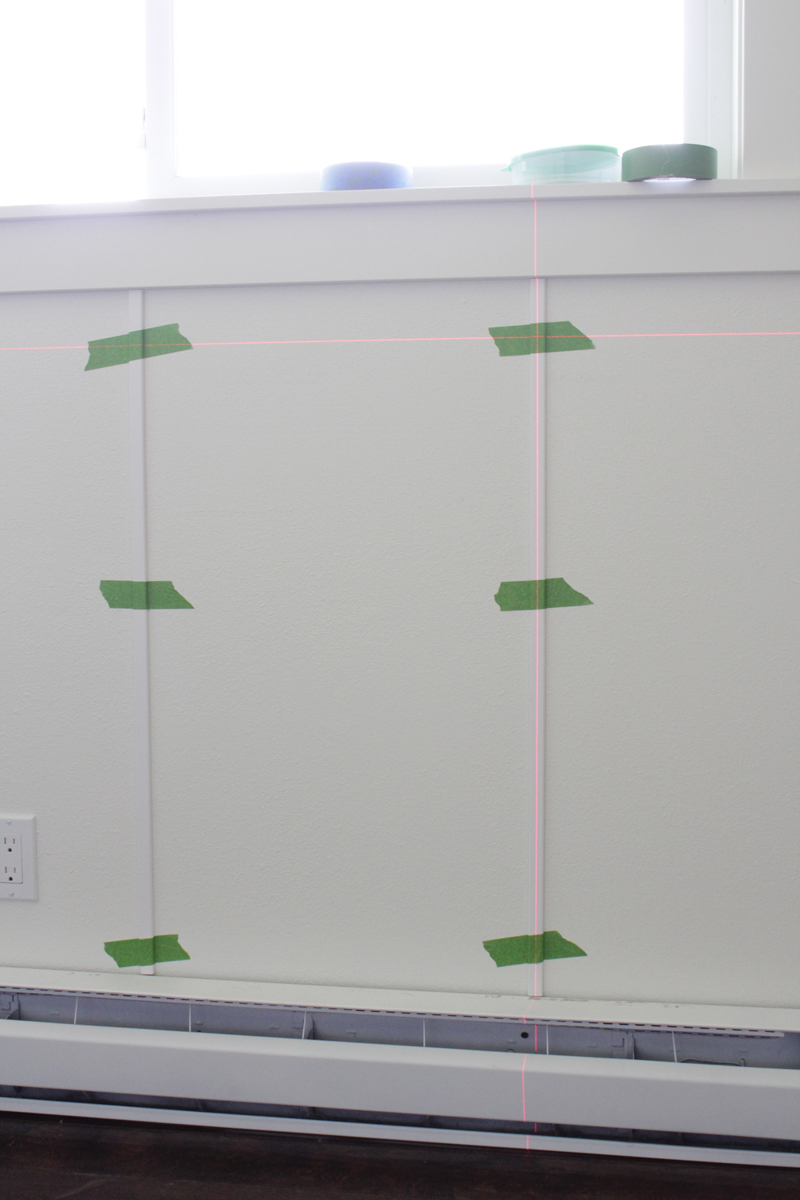
Our vertical rows are approximately 20" apart and centered on the window. Once the bars were cut, and we were sure of the placement, we took them down and sprayed them, then reattached the bars with our nail gun and finish nails.
Now comes the more complicated part...the horizontal bars. The depth of my angle was decided for me by the distance from the top of the window to the ceiling. I made them whatever angle was needed to fit a full bar in between the vertical bars. My angle cuts came out to be 21 degrees. I'm sure there is a proper way to determine the correct angle (perhaps with a protractor), but I found mine with a scrap piece of trim and trial and error.
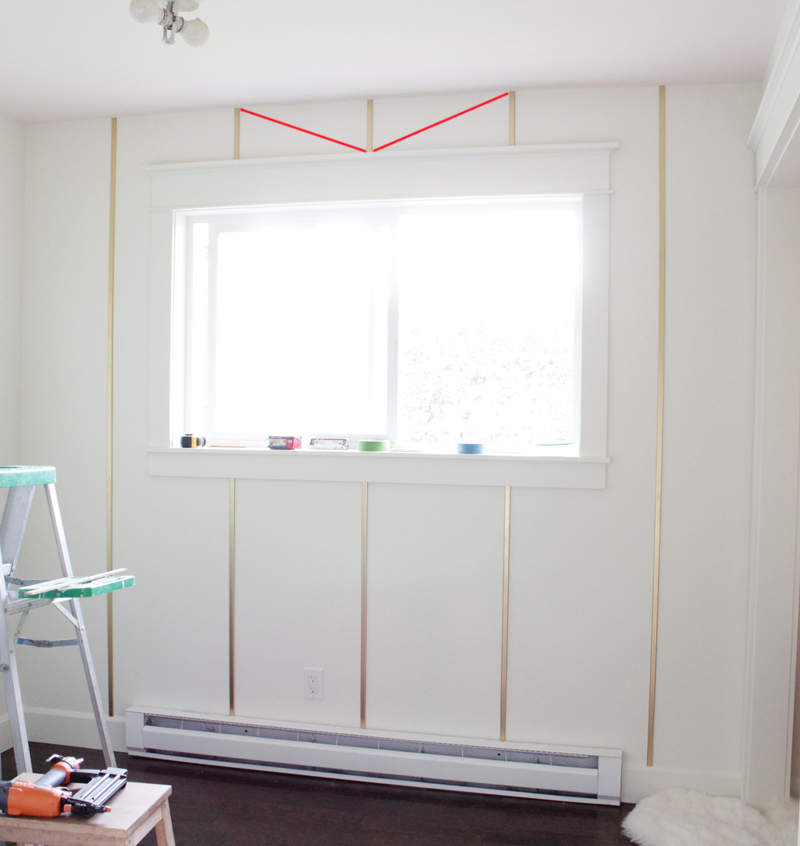
Place the top row first by keeping the depth of each v the same distance from the ceiling.
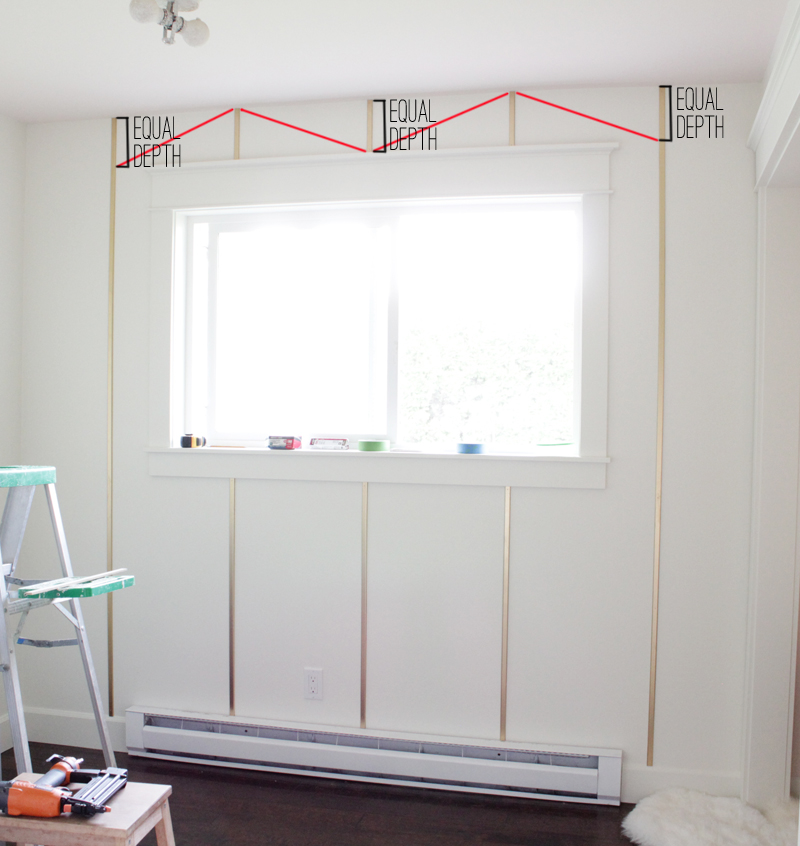
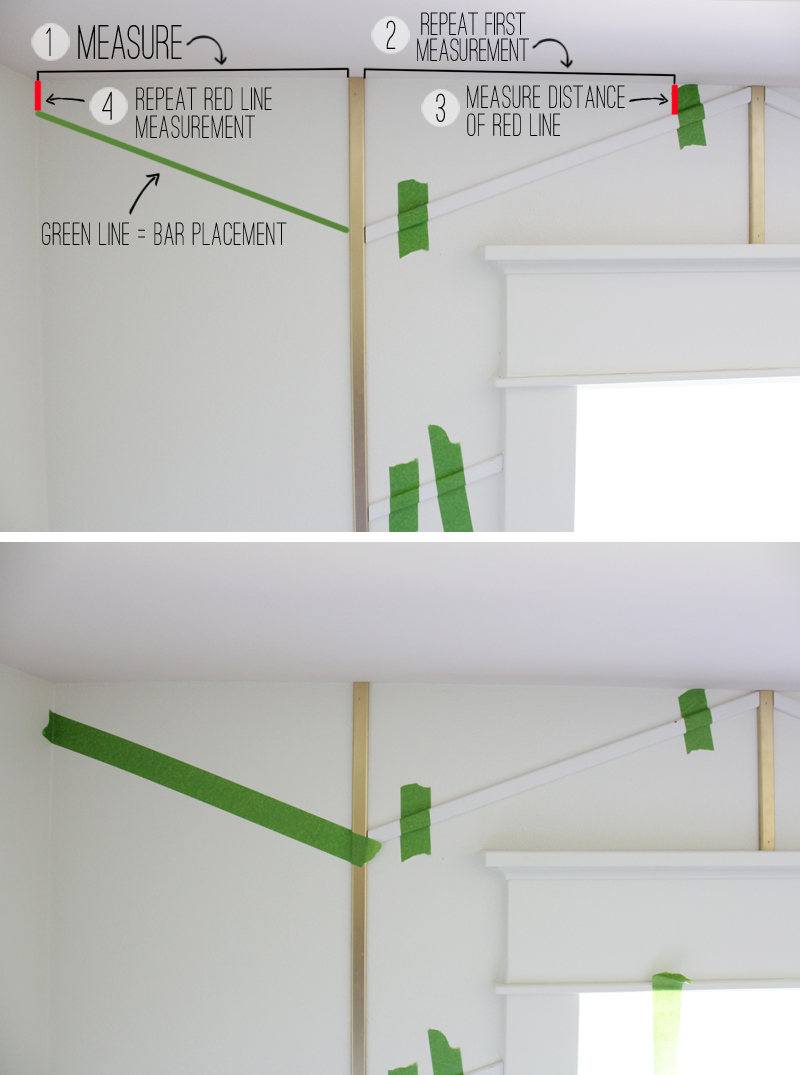
The two end sections of my wall are not a full 20" and therefore the horizontal bars would need to end at a certain point on the wall. To get that point...
- First, I measured the distance from the bar to the wall of the short section.
- Then marked that measurement on the full section next to it.
- Next, I measured from that point down to where it met with the bar.
- I took that measurement and took it back to where to bar would meet the wall.
(It's a little complicated but I hope the image makes sense.) I marked the placement with tape to be able to measure the length my bar needed to be cut.
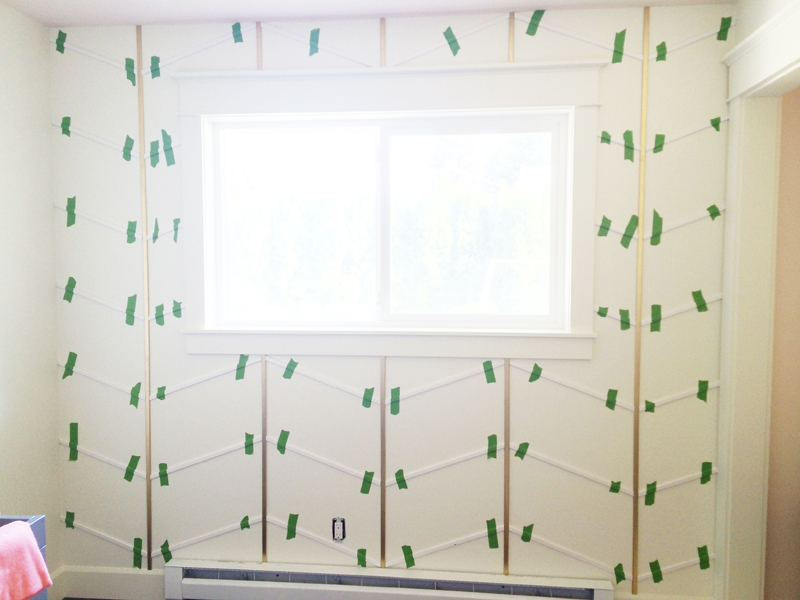
Once you've got all that figured out it gets easier. Decide how close you want your vertical bars to be. I didn't want ours too close together but I knew I wanted three full horizontal bars below the window. That meant our horizontal bars would be 12.5 inches apart. I cut a spacer and used that to mark and place the rest of our bars. (The angle cut on the spacer is the same angle your horizontal bars are being cut at.)
![]()
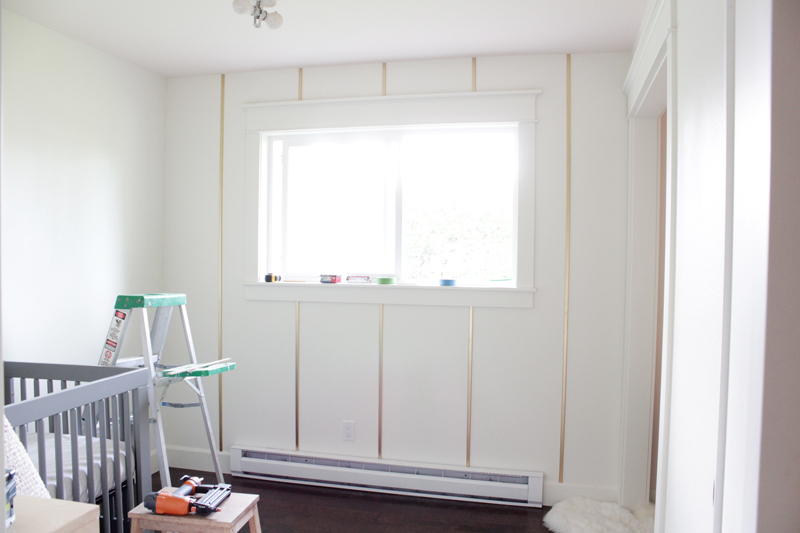
We placed all the horizontal bars and made sure everything fit just right.
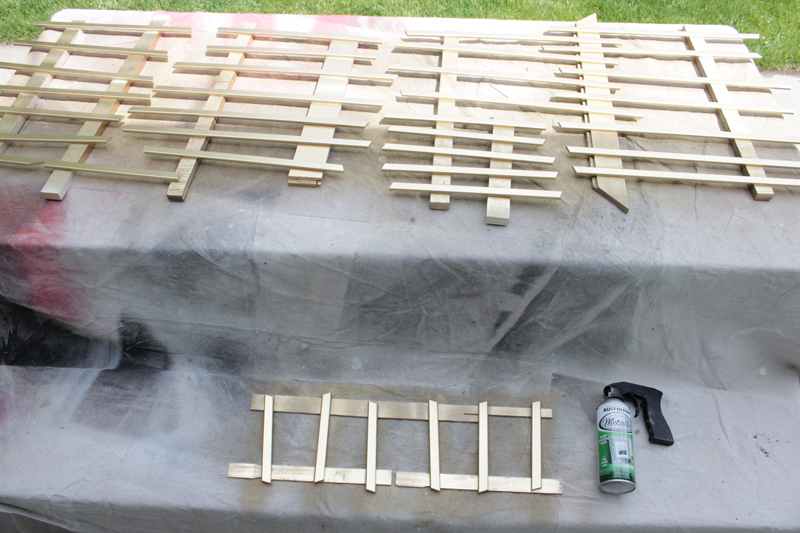
As I took the bars down to paint them they each got labeled with their proper placement, then got a new coat of shiny gold paint. I used Rustoleum Metallic Gold spray paint.
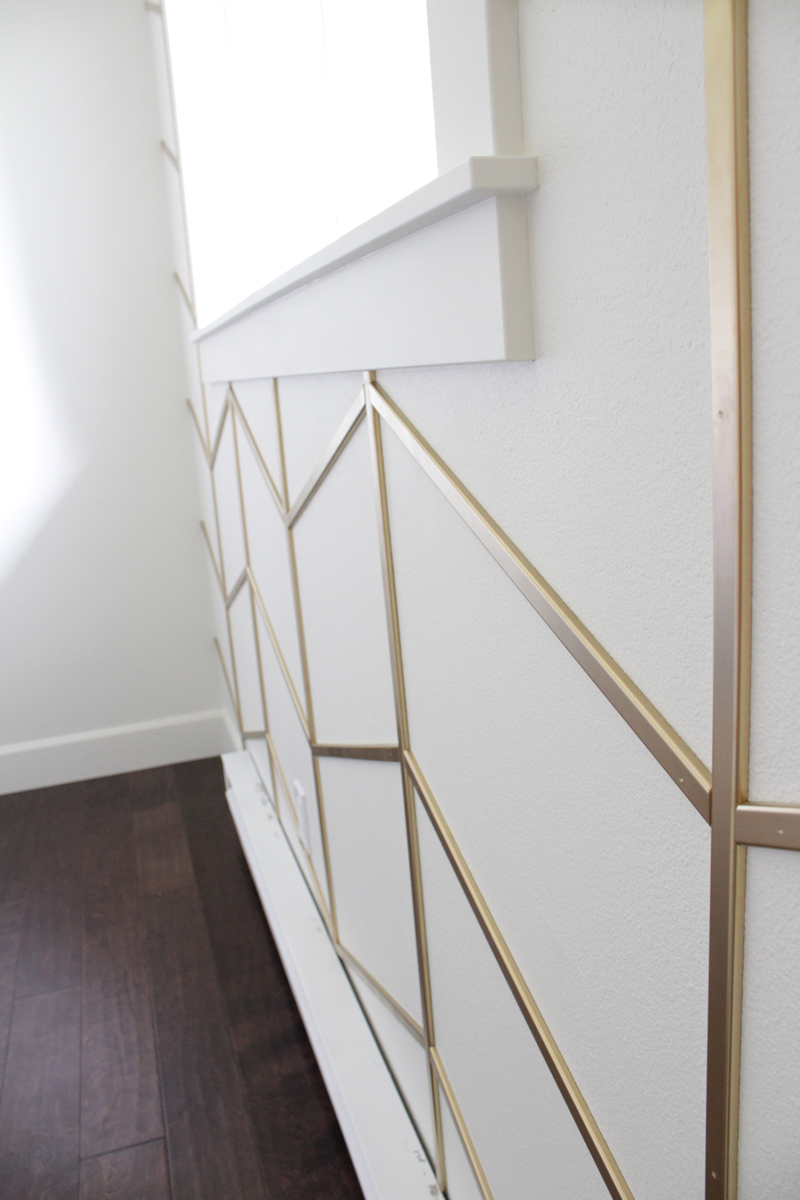
I realigned my top row of bars, used the spacer again to place all the rest, and viola...gold herringbone wall.

I filled all the nail holes and touched them up with a dab of paint and called it good. I love how it turned out even more than I thought I would. The bonus? The entire time my husband kept saying "I don't get it" to the whole idea, but when all was said and done, he likes it as much as I do...whew!
What I love about using the trim instead of paint is the depth it gives. The light shines off of it in such nice ways...it makes me happy.
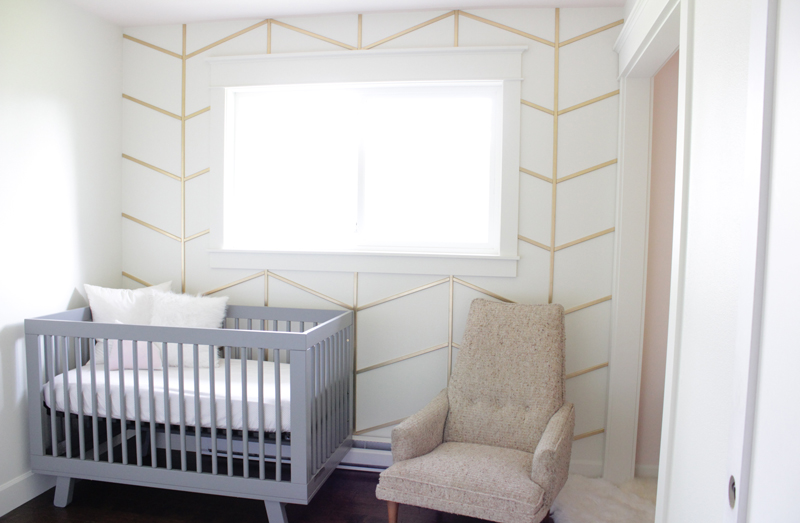
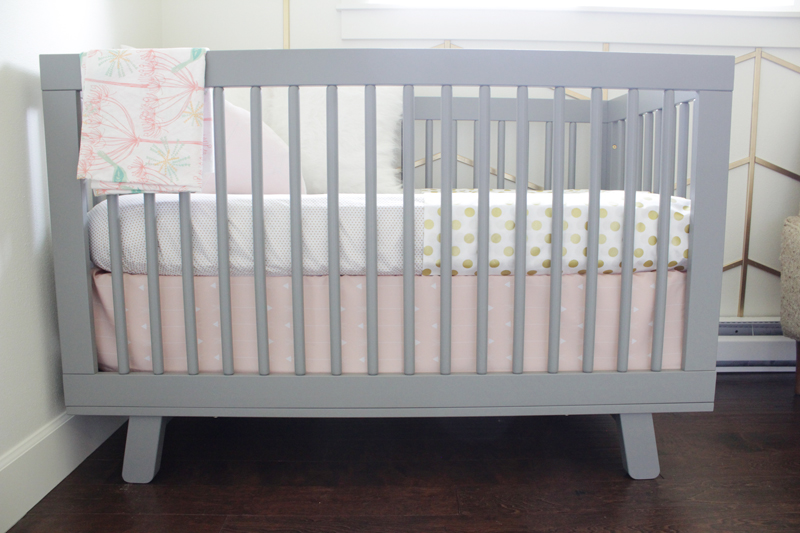
There is still a decent list of things that need to be done before we are finished, but here's a peek at what the crib is going to look like.
Now...back to work!
Other projects in this nursery:
Tags
- Facebook Like
- Google Plus One

- Log in to post comments


Comments
LOOKS AMAZING - seriously!! Can't wait to see everything finished!
My daughter is amazing! It looks wonderful.
Wow, I'm not sure where I came across this project but it is stunning! Seriously, so in love! Pinning and would love for you to link up at the DIY'ers! http://biggerthanthethreeofus.com/the-diyers-6/
Found this on Pinterest and it's genius! What a great, creative, and EASY DIY! Nice Job! :)
Sharna
perfectlycloudy.etsy.com
I love this!!
Great idea! I love the gold and 3D effect.
Thank you for sharing..and giving such great detail about the process and products used..i cant wait to try this..looks AMAZING..love the gold!!