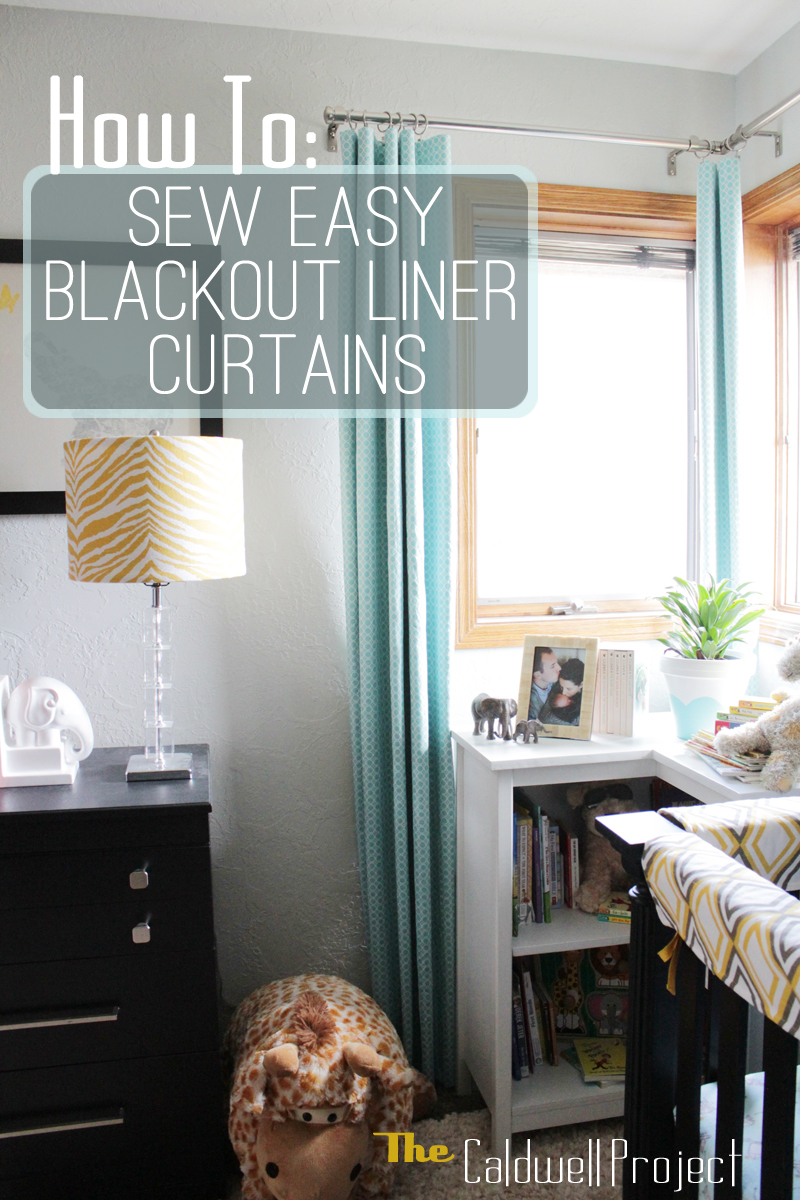
Making blackout curtains can seem kind of intimidating but it's actually very easy.
Supplies you'll need for this project:
- Fabric of choice (how much all depends on the size of your specific curtains)
- Matching thread
- Blackout liner
- Lots of straight pins
Step one is cutting your fabric to the length and width of your choosing.
For example: I wanted a once inch hem at the top of the curtains, a four inch hem at the bottom, and a 1/2 inch hem on the sides. My curtains needed to be 85 inches long. (I used the full width of the fabric which was about 44 inches.) I added the length of what my finished curtain needed to be (85") plus a 1 inch top hem (2") plus a 4 inch bottom hem (5") which equaled a cut length of 92 inches.
If you are cutting the width of your fabric and want a 1/2 inch hem, you would take your finished width of curtain and add 2 inches for your cut width. I used the full width of the fabric (44") so my finished width ended up being 42 inches.
The blackout liner needs to be cut to the length and width of your finished product. In my case 85"x42".
Once your fabric and liner are cut, the first thing to do is iron your top hem. Fold over your fabric one inch, iron. Fold over one inch again, iron.

With your hem ironed, tuck the blackout liner under the hem leaving equal amounts of fabric on the sides and pin all across the top.

Sew the hem down using about an 1/8 inch seam allowance (or whatever you are comfortable with).

Next, iron your bottom hem. Fold over 1 inch, iron. Fold over 4 inches, iron.

Lay out your curtain, liner side down.
Side Note: If you are doing this on wood floors instead of carpet you could probably lay them liner side up, but on carpet the fabric puckers under the liner against the carpet, so the liner needs to lay down first. The point is to make sure that your fabric is laying flat against your liner. If it isn't, your curtains will not lay smooth when they are hanging.

Just like you did on the top, tuck your liner into your bottom hem leaving equal amounts of fabric on the sides, pin then sew.

With your top and bottom sewn, lay your curtain back out. Make sure you have equal amounts of fabric hanging over all the way down both sides, and pin the heck out of the sides. The more the better. When you go to iron and sew the side hems this will make it easier to keep the liner in place. (This is my middle dummy panel.)

Fold over your side hem 1/2 inch, iron. Fold another 1/2 inch, iron, pin and sew. Repeat for the other side.

And your done! See, not too hard.

Time to hang!

We hung these curtains with clip rings but you could easily add grommets or even button holes (just be sure to adjust for length).

Here is what the back looks like on the finished product.


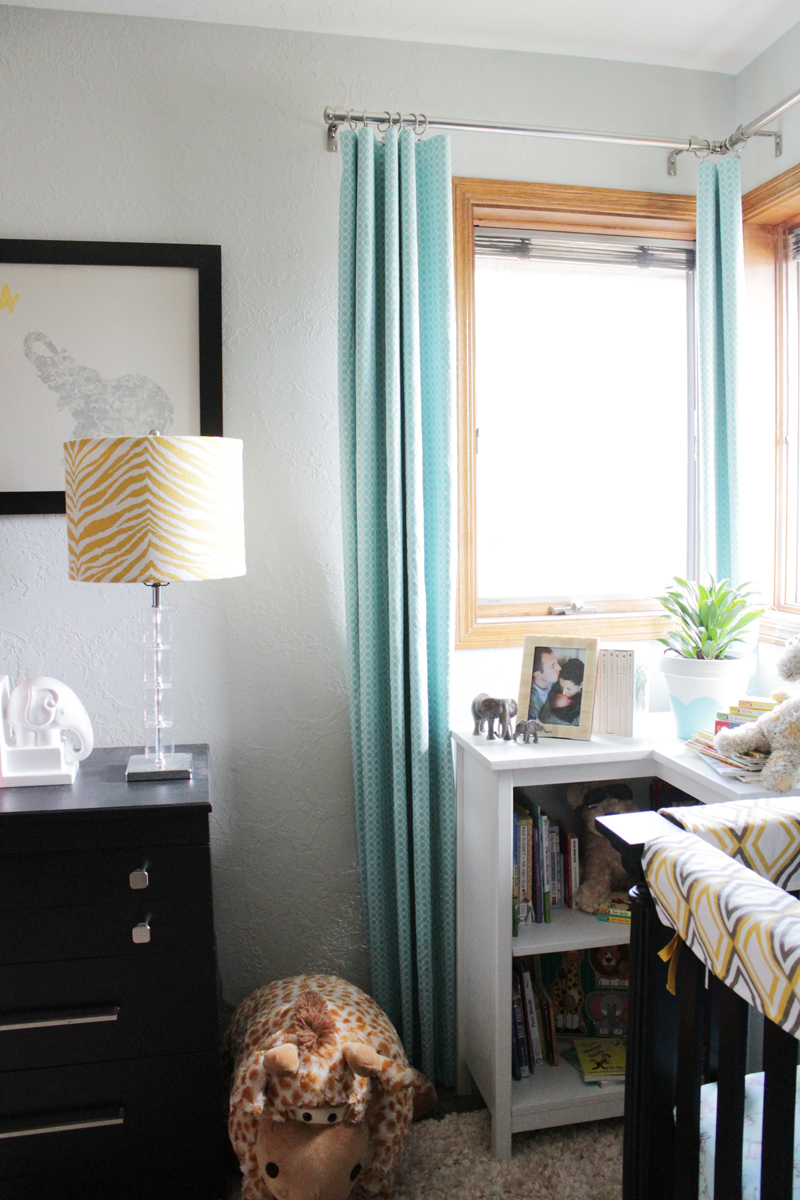
They look pretty good in their new home. I wish I would have thought to take a picture with them closed so you could see them in all their light blocking glory, but of course I forgot. Maybe next time I go out I'll get a quick shot and do an update. Until then, just imagine a black box and that'd be pretty close.

Linked With:
Tags
- Facebook Like
- Google Plus One

- Log in to post comments


Comments
Hey Girl! It's Deonna from the Child at Heart blog. I was just stopping by to say that I love these curtains! I have done something similar in our room because my husband works night and has to sleep in the day and I also have them in my son's nursery. They really makes his naps better! I am doing a great spring necklace giveaway and would love for you to come by and enter to win :) Have a joyful week!
http://www.thechildatheartblog.com/2014/04/spring-statement-necklaces-fr...
I am definitely doing this! We're on second shift and it gets rough either sleeping through the glorious sunlight or going to bed with the sun!
Your curtains turned out great and the entire nursery looks like such a calming and beautiful space. Love! Thanks for sharing at The Makers!
I LOVE these curtains!! and the nursery looks beautiful! I need these for my window when the direct sun comes in in the morning. I would LOVE for you to share them at our craft party! http://sewlicioushomedecor.com/show-licious-craft-recipe-party.
Have a great weekend! Marti