My little one is notorious for ripping off whatever bib I put on her. Which, of course, results in dirty clothes that can be rather hard to clean.
In my efforts to keep her clothes covered I bought the nice big plastic-y kind of bibs. Without fail they always got ripped off. What is it about bibs that make kids want to rip them off?
I saw at a baby shower once, the bibs made out of dish cloths. Pretty ingenious, but I kind of wanted something just a little cuter.
In my quest to find just the right bib for my little one, I found the "Bapron"! Funny name, wonderful bib! Well, it's a bib/apron, hence the name "Bapron". It has arm holes and a tie around the neck so little ones can't rip it off (or at least would find it very difficult to do so).
You can buy the pattern/tutorial (she even gives the option to purchase a license to sell) for the "Bapron" at Craftiness is not Optional.
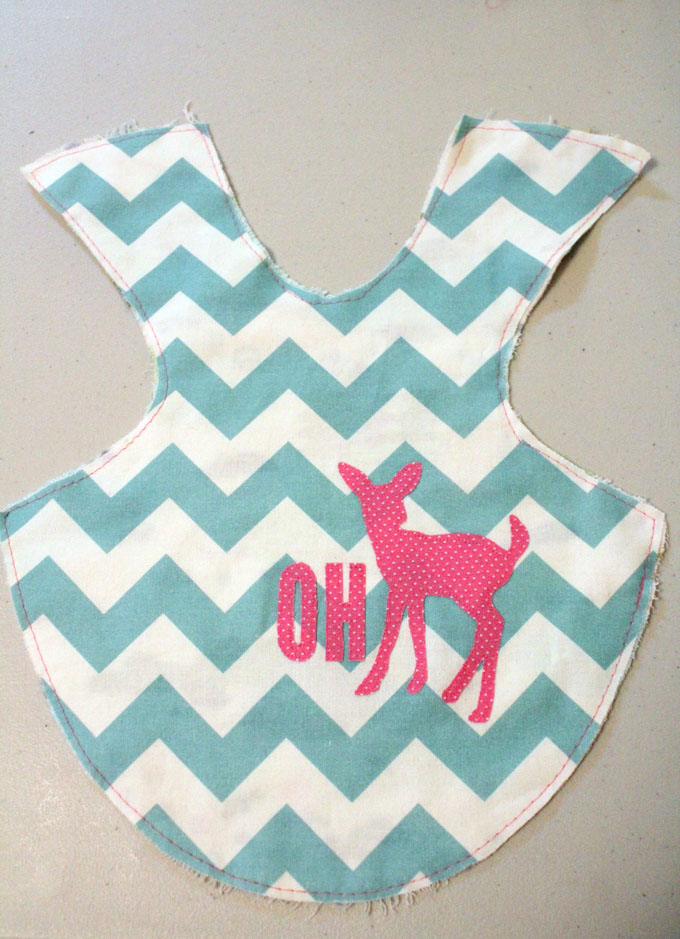
I wanted to make mine with a little flare so I decided to add some appliques.
Disclaimer: This is not the full "Bapron" tutorial. Only the additions and modifications done by me.
If you want to applique something on your bib you'll need these items beyond the original tutorial:
- Heat n' Bond
- Fabric for applique
- Matching thread
To applique something on your bib you will need to do that before you connect the front and back of the bib together.
I attached my applique with Heat n'Bond and then sewed around the edges to make sure it would stay put, especially since bibs will see a lot of wear and tear. Once your applique is attached and your two front and back pieces are put together it will look something like this.
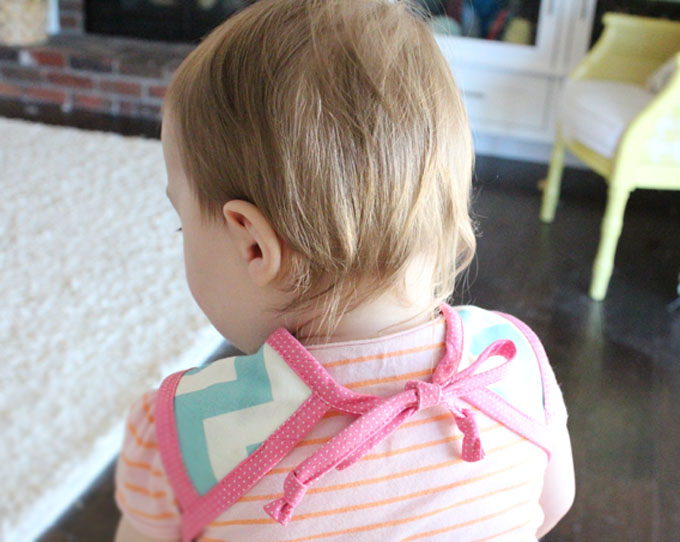
My second alteration was on the bias tape. After making my first bib 100% by the original tutorial I felt that two pieces of bias tape were a little too short. So, I lengthened the tape that creates the armholes and the one for the neck tie. (This is the method I use for making bias tape.)
The bias tape for the armholes, (shown unattached below) I added an extra inch to make 33" (which could have even maybe had another inch for wiggle room).
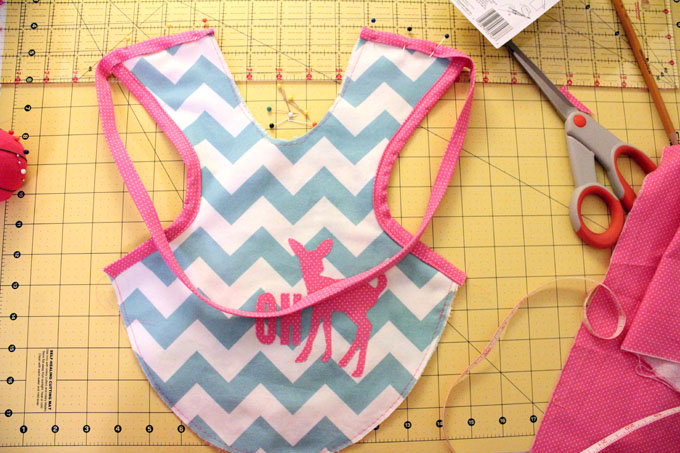
I also added about an extra 4 inches to make 42" on the tie for the neck, which would be the bias tape in the final step of the original tutorial.
And there you have it! Super cute, super functional bibs!

Another great thing about these bibs? They're reversible!
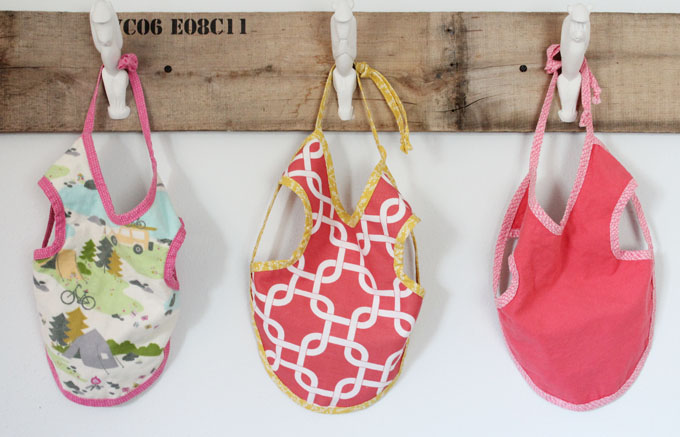
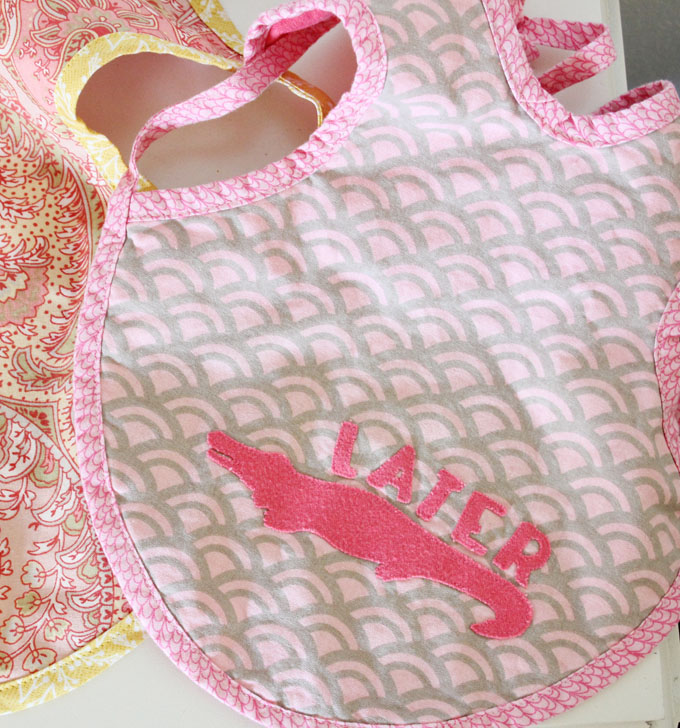
Here are some shots of the bibs I appliqued.

And here's the very talented model.
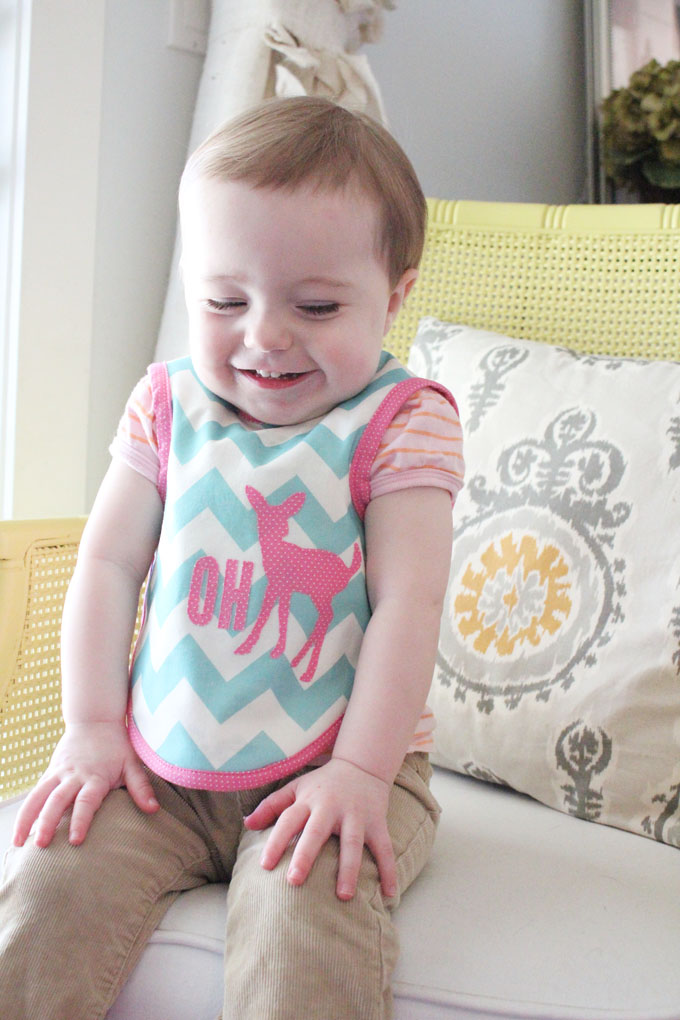
So adorbs, non?!
This bib is meant for a baby or smaller kid but can be worn for a long time. I even tried it on my 4 year old, and even though the fit was tight...it still fit.
I have a feeling three isn't going to be enough. They are pretty easy to make and whip together pretty fast. If you used store bought bias tape and didn't do any applique, I bet this could be made in half an hour.
DISCLAIMER:
The "Bapron" pattern used in this post is not of my own design. The tutorial is not the original "Bapron" tutorial. All images, words, fabric choices, and/or modifications of the pattern are original to me. To purchase the "Bapron" pattern and tutorial please visit the Craftiness Is Not Optional Etsy store here.
At the time I acquired this pattern and at the original date of this post, the "Bapron" pattern and tutorial were free to the public.
Linked With:


Comments
Love it, Valerie!!
Ah, thanks Heather!
If you want to make some boy ones, I know a little boy who would love them ;)
I love this! I have lots of little ones and will definitely put this on my to-sew list.
Popping over from HoHs today. I blog over at http://wegotourhandsfull.blogspot.com Come say hi!
What an adorable and practical idea! I could have used some of those when my son was smaller! Would you consider sharing here? http://www.oneartsymama.com/2013/04/shine-on-fridays-74-and-grab-bag.html
This is adorable, and so is your little sweetie. I love the fabrics you chose, and the deer appliqué is darling.
www.avocadosandgeraniums.blogspot.com
They are adorable.Love the fabric choice
oh my goodness, how darling! And what a lovely model :)
These are adorable! I wish I had found this about a year ago. My son would never keep his bib on! You have a super cutie for a model, too:)
XO,
Christy
So cute and love your appliques & fabric choices. My 3 yr old daughter is still beyond messy when she eats (after 2 boys I was sure she'd at least be neater than them). Maybe have to make some of those. Would love if you linked this to my Craftastic party: http://www.sewcando.com/2013/04/craftastic-monday-link-party-laminates.html
Thanks for posting! This is GREAT!
These are not only adorable but very practical! I love your fabric choices. I would have loved these with my babies. If you get a chance, please share this on my sunday linky party (starts sat 6pm) http://suburbsmama.blogspot.com/
Loved these so much, you've been featured at Sew Can Do - stop by & grab a Featured On button. Thanks for linking to the Craftastic Monday party at Sew Can Do!
Thank you for the tutorial I had a Simplicity bib pattern I wanted to alter and thru your pictures I as able to redesign it and came up with my own. once again thank you.
Great, clear tutorial with helpful pictures. Thank you.
Thank you so much for this tutorial! I got this pattern a long time ago but never got a chance to make it. I was wrackin my brain to remember how to put it together and how long the pieces needed to be! You saved me! LOL