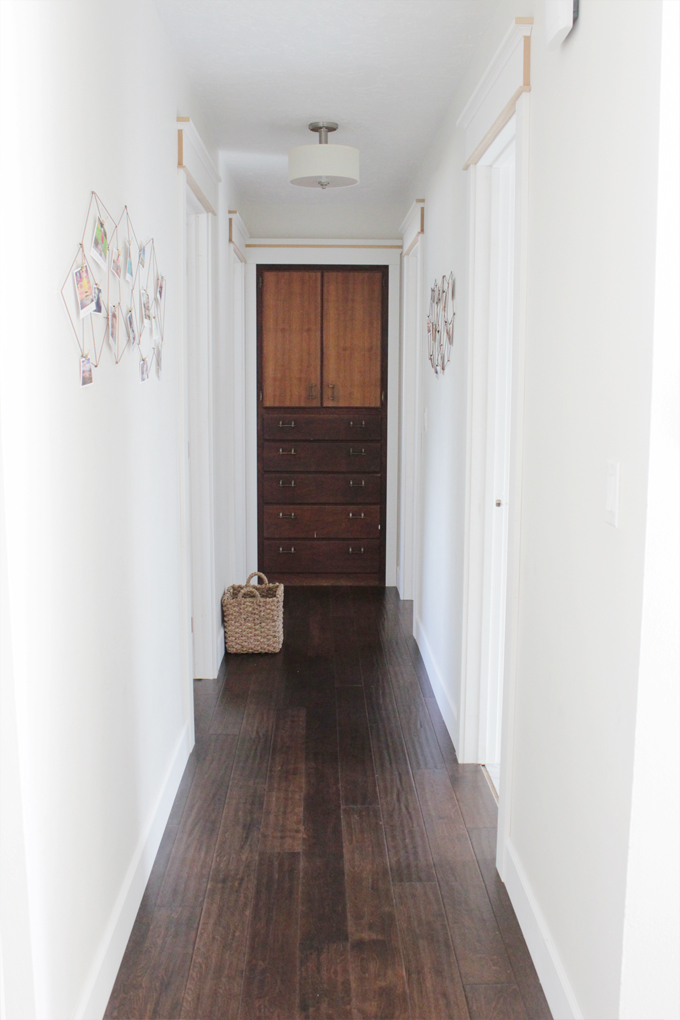
I've been thinking a long time about how I wanted to decorate the walls of our hallway. And by a long time, I mean like since we remodeled over a year ago.
Sometimes I'd think it would be better to leave it bare, then I'd think we needed another picture gallery. I constantly went back and forth.
Then, I started thinking about a way to maybe showcase our Instagram pictures *ding* lightbulb. An idea hatched and I was off to create a sketch.
I have been loving all of the geometric design lately so I wanted to make something for my wall to hang pictures on that had that look. I came up with a few sketches and went about implementing how I wanted to put them on my wall.
Attempt one didn't go so well...attempt two didn't go any better.
So, I decided to go straight to the wall.
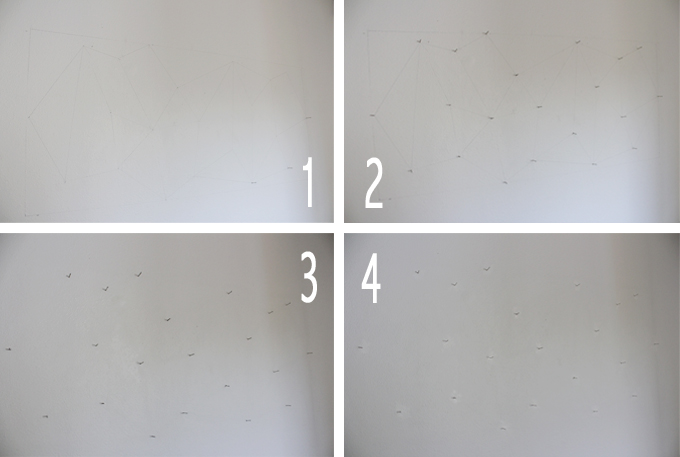
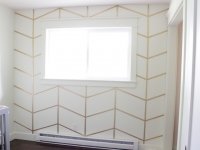
The first thing I did was put my sketch on the wall. Next, I put in a nail everywhere there is a turn or cross section. Then, I erased my lines and painted the nails to match the wall. (Sorry the pictures aren't very visible.)
After that I made a direction chart on my sketch. I didn't want any double lines and as few starts and stops as possible. It was a bit of a puzzle but I actually enjoyed working it out.

Once I had my directions down I went to the wall.
I didn't want to do the this in string or yarn since I wanted it to look more like wire. I found some bronze colored stretchy jewelry cord that was perfect, and ended up also buying some braided rope for a second photo holder.
I followed my directions and put up each section.
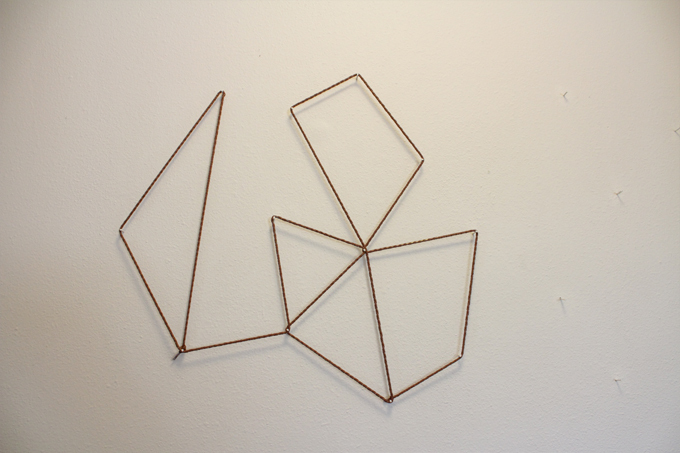
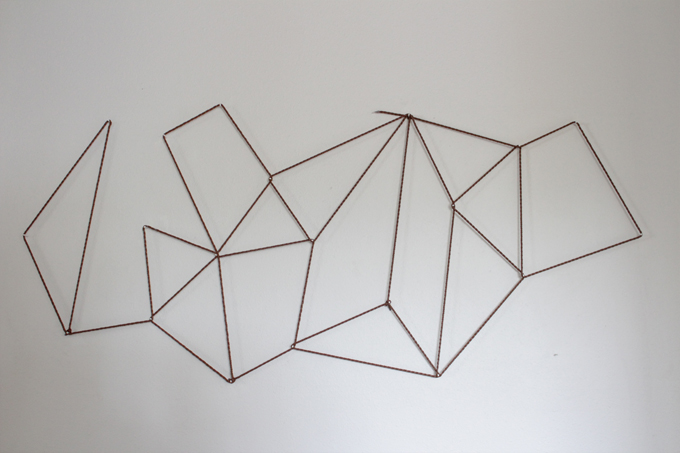
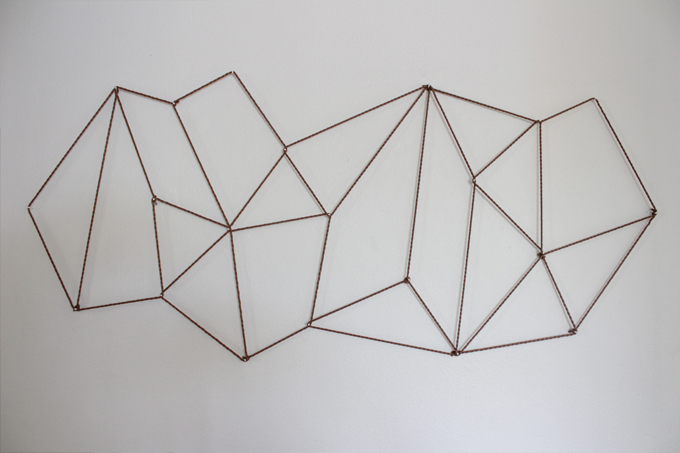
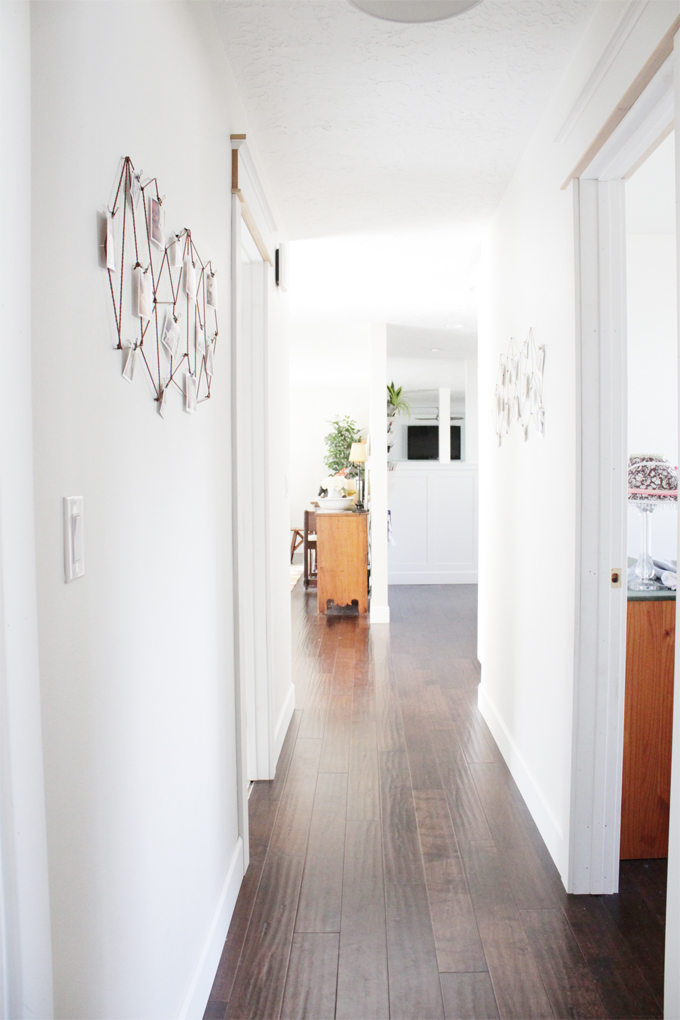
And viola!
I wanted to add all of our Instagram pictures that we loved, however we had a split between my husband and I on whether we should have captions on our photos or not. So, we decided that on one we'd go with captions, and on the other without.
And this is how they turned out! This is the braided rope.
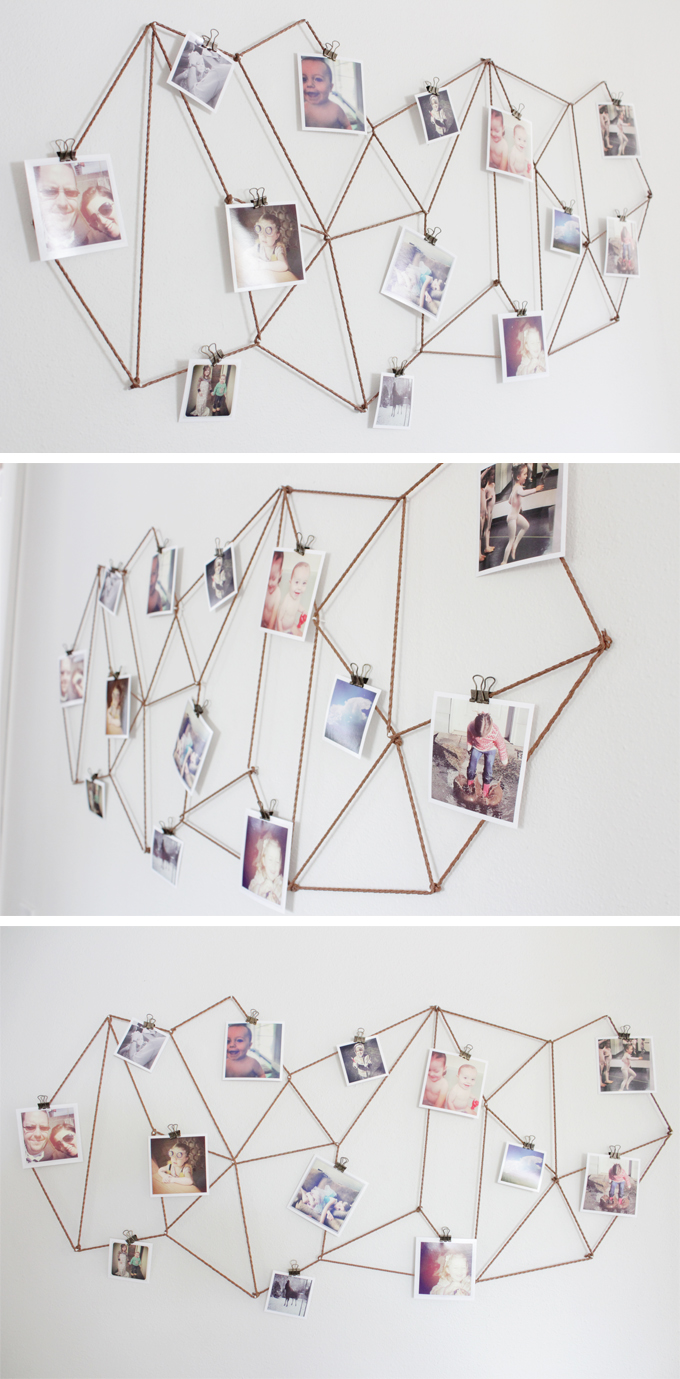
We printed our pictures at home and made them into 2x2 inch and 3x3 inch.
This is the bronze jewelry cord. The pictures with captions got an extra space at the bottom and we only did that on the 3x3's.
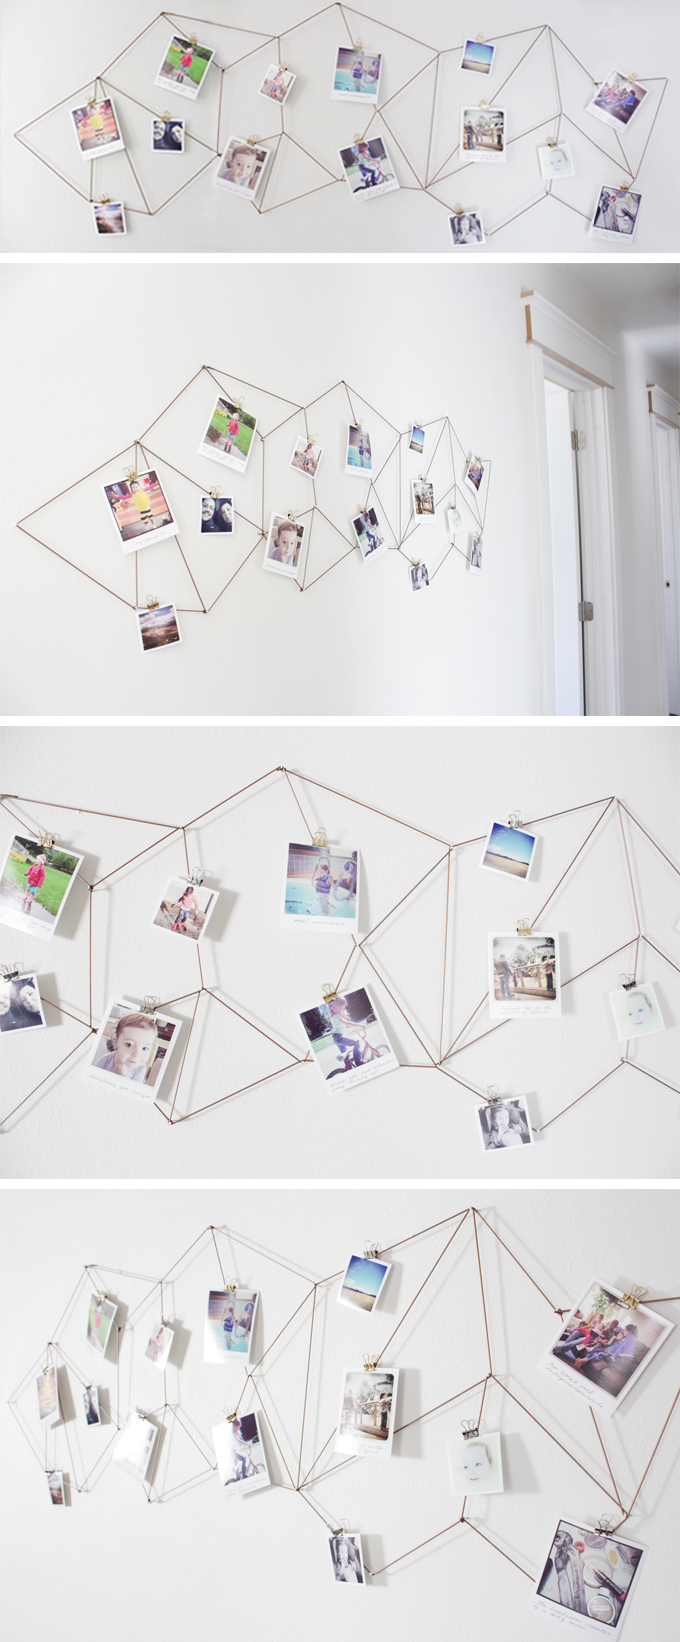
I used little binder clips to attach my pictures. On the jewelry cord they are painted gold and on the rope they are painted bronze with a dusting of gold.
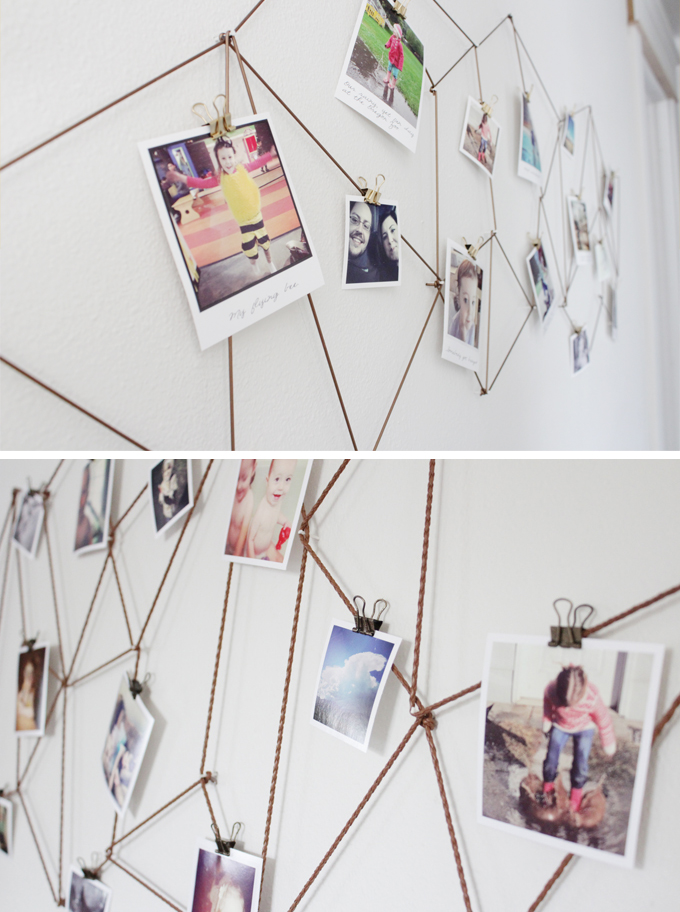
There was an initial concern about the nails sticking out too far and getting caught on them, but they are very low profile. The nails only stick out a half inch and we haven't had any issues so far.
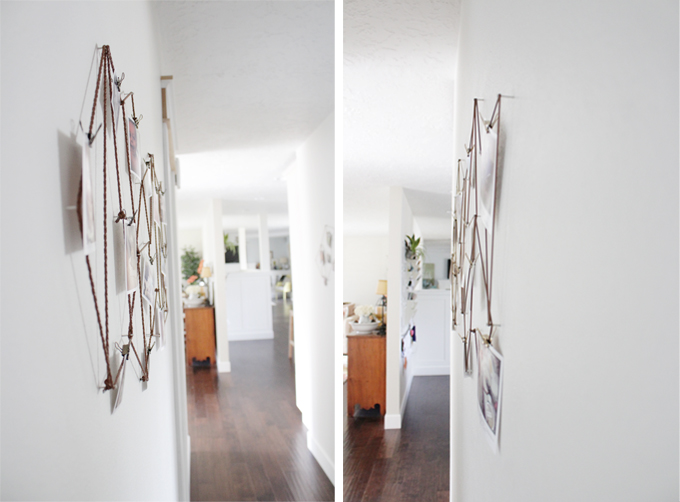
The hallway still has some work needing to be done like finishing trim, painting the black hole at the end of the tunnel, and adding some wainscoting, but the photo displays add a lot of interest and I love walking by and looking at all of our fun pictures.
And just as an FYI, the measurments for these are 4'x16" and 3'x16".
This project is also entered into the "Creating with the Stars" contest! Go click on #253 and give it a boost.
Linked With:
Update: I've had some questions concerning the actual process of how I put up my display. So, I made a gif that will hopefully show better the pattern of how each section went up and where I started and stopped each time.
Tags
- Facebook Like
- Google Plus One

- Log in to post comments


Comments
How long is each straight line? What is the length approx to make it 4'x16"
I loved this and made one for my home last year. Thank you for the great idea!!
How did you get your pictures to be in the 3X3 squares? When I try to crop mine into squares they look all distorted.
Thanks!
Hi Mary,
I do all of my photo editing in Photoshop. You have more control over your images and can rezise them without distortion.
Hi there! This is amazing but I'm wondering if there are any non nail options since I'm not a big fan of drilling. I can't wait to try it out!
That´s such a great idea! Looks amazing. I have quite a lot of pictures printed that I want to hang up, but since I´m only renting an apartment I´m unsure about the idea of putting that many nails into the wall.. Any suggestions for alternative ideas for securing everything would be much welcome. :)
Hey! I am obsessed with this DIY! SO cute.. I've been trying to find some the bronze jewelry cord you used and I can't find it. Even on Hobby Lobby's website. Could you please reply with the exact name and brand you used? A direct link to the product would be wonderful too! Thank you!!
Hi.. Very inspiring.. Want to try it ☺
I love this!
Thanks for posting
I love this!
Thanks for posting
Absolutely love this idea! Do you think there's any way you could do this without using nails - just thinking about the work it would take if you wanted to take it off the wall and fill in and paint the walls!
Hi Valerie,
I loved your idea so much I just did this in my living room!!! I just finished it and love it!!!!
Thanks for so much this idea!!! Greetings from Berlin :)
Amazing!! I've just seen this in Pinterest recently and it has really inspired an idea to display or holiday photos, thank you for sharing!
Hi, this is so great and we want to do the same in our long hallway :) The problem is we are not very creative... How did you copy the drawing into the wall?
I did it, and it is absolutely amazing!!! Thank you so much for posting it so clear for all of us!!! x
Hey, I would love to do this for my room, can I know what string did you use? Thank you
I'll love it. Thank you for sharing it !
Hey love this creative way to display pictures, I’ll definitely give this a try. What kind of nails did you use? And could you suggest where to purchase? xx
cet une execellente idee ce péle méle.je me suis mis a la fabricattion ce week forme geometrique ok malheureusement mon mur est en brique les pointes ne vont pas s enfoncer!Qlq a une autre idee.merci
Pages