It's finally here. The reveal of my family kitchen command center. I bet you thought is was never going to come! Sometimes life likes to interject, doesn't it? #lifesfunnythatway
This command center was certainly a "labor" of love. We built the pockets from scratch and they kind of gave us a run for our money. Not to mention, I swear, I sabotaged myself several times by shooting nails out of the sides of them. Sometimes a half inch just isn't enough space ya know?
But after much toil and (as I mentioned on Twitter and FB) many almost swear words, I finally put the last touches on the command center. TA DA!! Or, as my 1 1/2 your old puts it, DA!! #seriouslythecutest
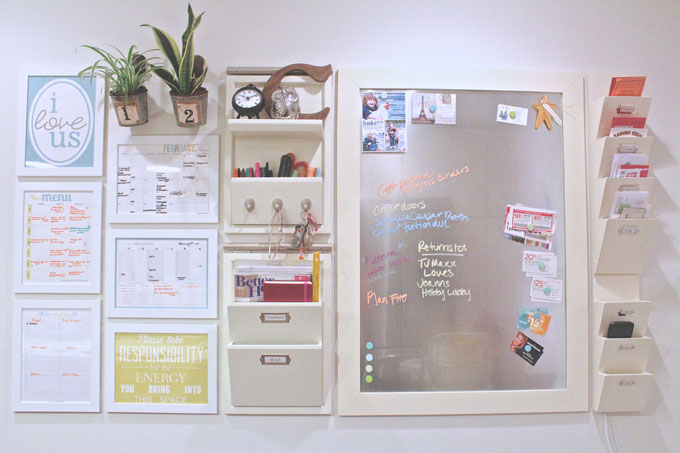
The magnetic board is one of my favorite features. It's a piece of sheet metal, with a piece of plexi-glass on top of it, all wrapped up in a custom frame. The sheet metal makes it so the board is magnetic and the plexi-glass makes it easy to write on. I found some nice earth tone wet chalk markers and they are the coolest things. They are a little pricey but I think they are worth it. Everything you write is bold, easy to see, and pretty. To hold through the plexi glass I bought some heavy duty magnets from my local hardware store and spruced them up with some Martha Stewart Craft Paint.

The side pockets were made just wide enough for to go menus, mail, coupons, etc.

The lower pockets are for our cell phones. We notched out the bottom and ran the cords through. Just below the pockets we have this nifty plug that has two usb ports in it. This eliminates the need for our chargers and keeps the plugs open.


The middle letter bin and office organizer are part of the Daily System from Pottery Barn. The office organizer is very handy for holding our keys, markers, scissors, and general "stuff". The letter bin is where I keep all of my magazines and idea journal. This is also a perfect place for the family iPad.

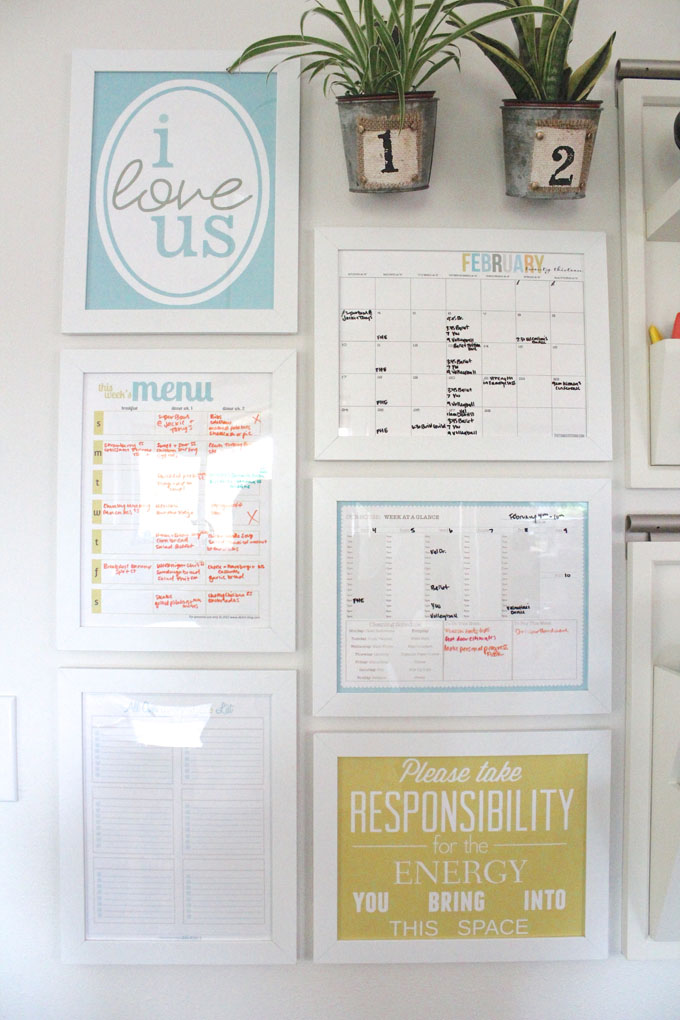
The left side of the command center is all about the printables. These keep my life from getting "ripped at the seams" (yeah baby, that's a Grease reference.) I keep a monthly calendar as well as a weekly calendar. The weekly calendar also has my cleaning schedule, weekly "to buy", and weekly "to do" list. I edited the Menu list to keep track of two weeks of dinners and eliminated lunch, which is usually just leftovers. The last sheet is an All Over Everywhere list to keep track of what I need at what store.. (Links to printables at the end.)
I tend to use C's in my decorating, so it's no surprise I put another one here. The little silver owl has been room hopping, since being on our Thanksgiving table, and I think he has finally found his home. The clock (and actually the "C" too) I bought in multiples so I could choose what combination went best on the little shelf. This little clock was the winner. It was a steal for only $12 (compared to some other similar, outrageously priced beyond my budget, clocks).

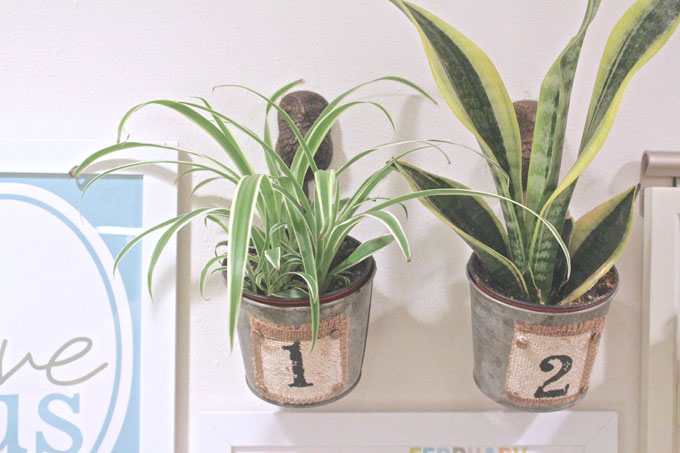
I had a small open area left that needed something. I originally was thinking about a plaque of some sort. I decided against it though and went with a little life instead. Greenery always makes a space more lively to me. I found the "cute as can be" little pots in the potting section of Joanns. It was a crazy lucky find. I really wanted numbers on my pots and these were ready to go. The owl hooks are from Hobby Lobby. They only had one of each color and I'm kinda glad. I really like the little difference in color, but probably wouldn't have done it if they would have had two of one color in stock.
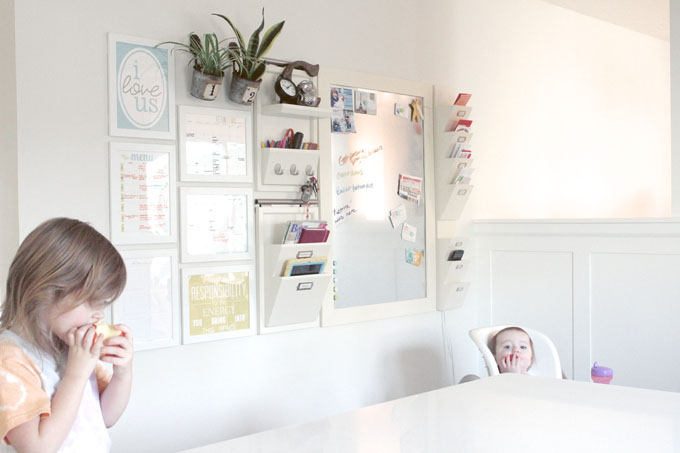
So there you have it. It only took a year and a day to get this done, but I'm so glad it finally is. We have already got a ton of great use out of this wall of organization. And my kids make pretty good accessories to go with it too!

I Love Us Printable by Eighteen 25
All Over Everywhere List by Clean Mama Printables
Monthly Calendar by TomKat Studio
Week At A Glance by Mommy Tracked
Responsible For Energy Printable by Kind Over Matter
This project is entered in the Creating with the Stars Contest!

Also linked with:
Tags
- Facebook Like
- Google Plus One

- Log in to post comments


Comments
Love this! Especially the magnetic board. I would love to make one. What did you use for backing? Is the sheet metal adhered to anything? Any additional project info you have for the magnetic board would be great! Thanks again!
Hi Vanessa!
The plexi-glass and sheet metal sit in the frame (not adhered to anything) and they are held in by nails around the back of the frame. On the back of the sheet metal I put plastic bumpers that push against the wall and hold the metal and plexi-glass closer together. Let me know if you have any more questions!
Hi Valerie!
My husband and I are working on a board similar to yours but we're stuck on how to hang it. He glued the plexi glass to the sheet metal around the edges and intends to glue the frame (white trim) to the plexi glass. So then we would have the sheet metal on the back.. I'd love for it to hang flush on the wall for ease of writing but we're stumped on how to hang it. We cannot make it permanent on the wall because we are military in base housing. Any advice?
Thanks so much!
Fantastic job! I too would love instructions for the magnetic board.
The plants are awesome! I never would have thought to use them here, but now your command center is alive :)
Great command centee. Starting one myself.
Where did you gt the sorters for mail, menus, etc?
Thanks,
Hi Niki,
The small pockets to the right of the magnet board are some we custom made. You can find the tutorial here. The other organizers on the left of the board are the Daily System from Pottery Barn.
Hi--I love this command center and am working on setting up one of my own. Two questions. I can't seem to locate the Menu printable on Delish...do you know if it is still there. Where in your kitchen did you set this up? I am having a hard time determining where to set this up in my house.
Thanks!
I can't find the menu printable either, so it looks like it is no longer available (there are lots of others on Pinterest). My center is right in my kitchen on a free wall I had. I would put yours in a location where you will constantly see it and it's easy to get to. If you have a cabinet that has the side free that could be a good place or if you have an open wall somewhere you can make a larger center like I did. Just think of what room you/your family spends the most time in and try to put it there or near there. Good luck!!
I like that you go two week's out on the menu... I can't see the menu that you have to see how you do that. Can you please describe the columns and rows you have?
Hi Deb,
The menu is three columns wide for Breakfast, Dinner wk.1, and Dinner wk.2 and seven rows down for each day of the week. I used the middle column that was originally lunches for dinners instead.
Hi! I just came across your command center and it looks amazing! Curious about the magnetic message board with the plexi-glass top: would it still be magnetic with a piece of glass on top of the sheet metal? I have an old picture frame lying around that I wanted to use and didn't want to have to spend extra on a piece of plexi-glass. Thank you!!
Hi Vivian, I'm not sure you would be able to find strong enough magnets to go through glass but you could definitely give it a shot. I didn't even try with glass but I'd love to know if it works!
I love your command center! Very inspiring! May I ask where you found the little clock? I've been looking for one like that, and, as you mentioned, they are quite pricey. Thanks!
Hi Vida, I can't remember for sure where I got the little clock. I think I remember getting it at Hobby Lobby though. I would also try a place like Home Goods, TJ Maxx, or maybe even Joanns or Michaels. Good luck!
This is amazing! I just have one question about the printables section. Did you buy frames and do you take the frames off the nail and replace the inserts weekly/monthly or do you use dry erase on them?
Thanks Jessica! I use dry erase on all of the frames. The only one that gets switched out is the monthly calendar. To hold them in place I actually use command strips for frames instead of nails. It keeps the frames in place a lot better.
This is a gorgeous set up!!! I was wondering where you purchased the side mail pockets?
How did you make the frame that goes around the magnetic board? Thanks LOVE this idea :)
OMGoodness, I am so impressed I showed my husband and he was even blown away. We have an office lots of cupboards and decked out nicely, but we have all our granddaughter's school stuff, bills, calendar all over the place, well actually it gets moved from one space over to another...we might try and do something similar on the large cupboard door thanks so much
Can you please come to my house and create this exact command center at my house (with "H" instead of "C") and I will pay you whatever it takes!! lol jk, sort of, not really jk though ;)
I love the sleek and clean look of your command center. Ir seems so functional. I love it. Question: When you write out your lists and menu, do you take the frame off the wall or do you write on it while it is hanging up? It seems it would be kind of an awkward angle to write on. I am afraid my hand writing might not be legible. ha! Do you find it easy to take it on and off if you do?
Hi Jess! My list page I write on only when I remember things, so it usually stays on the wall. However, my menu always comes down when I write out the week. I use picture hanging command strips (they are kind of like velcro but better) on the back of my frames so they go on and off of the wall with ease.
ooooh! Genius! I was thinking that a nail or hook would get loose or eventually carve out a ginormous hole in the wall if it was taken on and off all the time. I know me too, if it isn't easy or comfortable to use, I won't use it. Alright, now to plan out my wall and set it up. I am excited. Thanks again for the inspiration!
Also, how creepy is it that two people with the name Jessica pretty much asked the same question? Ha! I was just reading over the previous comments and noticed that. Super weird!
Fantastic! You thought of everything, I think. My favorites are the magnetic/plexi-glass board and slots for charging phones. I'll have to keep that charging idea in mind as we continue to work on our command center. Thank you for sharing!
Did you have your sheet metal polished?
No, we installed it just as it was from the store. :)
Hi Valerie I’m a writer at “MiniOwls blog”. I just wanted to let you know that I like your blog and many of your ideas but this one is one of my favorites. I loved it so much that I decided to feature it in one of my posts. To see it simply follow this link: http://miniowls.com/1/post/2015/07/my-favorite-command-centers-that-help...
We loved this idea so much! We found it on pinterest and shared your link with our readers. Perfect for getting the house ready for back to school time! sparklersmagazine.com
This is fantastic! I am trying to print the "Be Responsible" print - but I would like to have it in yellow like yours shows... the only one I see the is green one. Do you have a link to the other colours? THANK YOU!
Hi Beth! Unfortunately, that is the only color offered. I altered mine in photoshop to get the color I was looking for. Hope that helps!
Awesome Command Center!!! For the Command Picture Hanging Strips--I assume you you have to put one part on the wall and the other part on the frame. How did you line them up so that they would match?
Can you tell me did you have the plexiglass and metal cut? Or buy it? Where for either? Also did you just put it in a frame or did u make the frame? I love this but don't know where to buy plexiglass or sheet metal. Thanks!
We bought both the plexiglass and sheet metal from Home Depot, but cut them both at home. The sheet metal can be cut with tin snips and the plexiglass can be cut with a table saw or with another similiar saw. I'm not sure if they will cut them at the store since we never asked. We custom made the frame for the metal and the glass.
I have the same questions as Kate asked on Nov. 3 - where to buy the plexiglass and do you need to get it cut. Also, I already have a metal bulletin board I can use that can be hung on the wall (has holes a sort of metal lip on the back with holes that you can put screws in to affix to the wall). Would I be able to just put the plexiglass on top of my board with very strong magnets and not have to frame the board? Just wondering if the magnets will be strong enough to hold the plexiglass in place without having to frame the two together.
Please see the reply to Kates question in regards to where I purchased plexiglass. In answer to your next question...I don't think magnets alone would be strong enough to hold the plexiglass. We use heavy duty magnets to hold papers on the plexiglass and with more than a few papers they loose their pull. You could maybe use some sort of adhesive around the edges between the plexi and metal if you didn't want to make a frame. You could also screw them together, however the plexiglass is somewhat easy to crack when drilling through so it would take a gentle hand. Hope that helps. Good Luck!!
Love your command center! Question regarding your magnetic board...what are the dimensions of the board and where did you get the frame and sheet metal? How did you secure the board to the wall (I'm assuming it's a Little heavy because of the sheet metal)?
Oops...just saw your reply to Kate! Still curious on how you secured the PG to the SM...
This is the best command center I have seen! Would your husband be willing to make more of the side pockets (small letter bins)? I saw the tutorial, but I'm not able to make them. I would love to buy them from you :)
I love this command centre! I can definitely work with it! Very proud project! Awesome job! Where did you get the supplies for the magnetic board and what are the measurements? Any advice ? Thank you!
Did you edit your print outs? It looks like your week at a glance calendar has time slots next to each day, but the one you linked to does not.
I've been looking for months for ideas to get organized. Found it!! Love yours!!
i love this Pottery
Pages